Create spider templates#
Scrapy Cloud allows creating virtual spiders, spiders that are not actual Scrapy spiders, but a set of spider arguments to be used when running an actual Scrapy spider, a spider template.
This is what you did in earlier chapters. You created virtual spiders in Scrapy Cloud for the https://books.toscrape.com website based on the built-in e-commerce spider template.
In this chapter of the Zyte AI spiders tutorial, you will learn how to write your own spider templates.
Use your subclass#
In the previous chapter you created a
subclass of the e-commerce spider template:
custom-ecommerce.
Now create a virtual spider that uses it:
Select Web Scraping Copilot › Spiders › Deploy to Scrapy Cloud to redeploy your latest code to Scrapy Cloud.

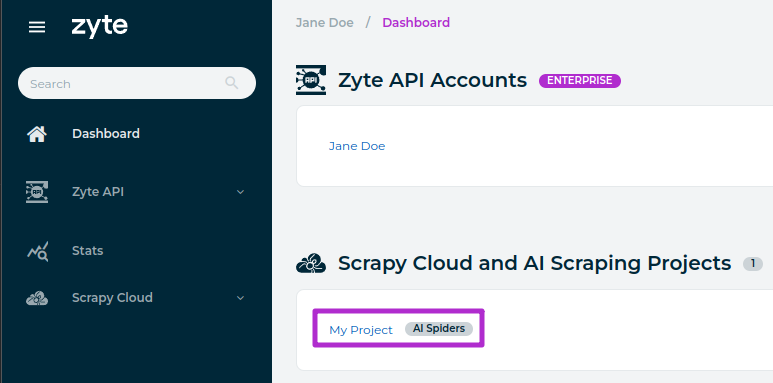
Log into the Zyte dashboard and click on your Scrapy Cloud project.

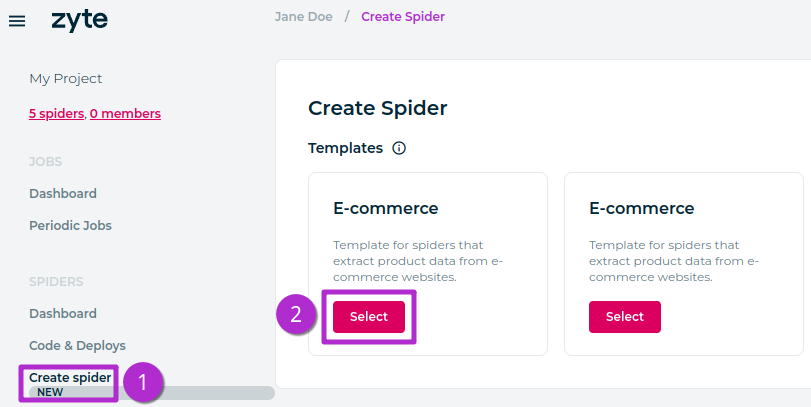
Click Spiders › Create spider, and in the 1st E-commerce box, click Select.

Fill the fields that show up as follows:
On the Name field, type “books.toscrape.com / Mystery category (HTTP) / dark”.
On the Inputs / URL field, enter the same URL as before:
https://books.toscrape.com/catalogue/category/books/mystery_3/index.html.On the Extraction Source field, select httpResponseBody.
On your custom Require Url Substring field, replace
murderwithdark.
On the bottom-right corner, click Save and run.
Your new virtual spider will use your custom-ecommerce spider class, and
yield only those 2 books with “dark” in their title.
Virtual spiders make it easier to run and monitor jobs when the same spider needs to be called with different arguments on a regular basis.
If you modify your custom-ecommerce spider in the future, the changes will
apply to all the virtual spiders that used it as a template.
Add template metadata#
Not every spider in a Scrapy project is considered a template. For a spider to
be considered a spider template, it needs to declare spider metadata with the
scrapy-spider-metadata Scrapy plugin, and
set template to True in that metadata.
All AI spiders are spider templates. And when you created the
custom-ecommerce spider, you inherited the metadata from the ecommerce
spider, which is why after selecting Create spider you got 2 identical
spider templates.
However, it is confusing to have 2 identical templates. Time to fix that. Replace your custom spider code with the following:
from pydantic import Field
from scrapy import Request
from scrapy_poet import DummyResponse, DynamicDeps
from scrapy_spider_metadata import Args
from zyte_common_items import ProductNavigation
from zyte_spider_templates import EcommerceSpider
from zyte_spider_templates.spiders.ecommerce import EcommerceSpiderParams


class CustomEcommerceSpiderParams(EcommerceSpiderParams):
    require_url_substring: str = Field(
        title="Require URL Substring",
        description="Only visit product URLs with this substring.",
        default="murder",
    )


class CustomEcommerceSpider(EcommerceSpider, Args[CustomEcommerceSpiderParams]):
    name = "custom-ecommerce"
    metadata = {
        **EcommerceSpider.metadata,
        "title": "Custom Ecommerce",
        "description": (
            "Ecommerce spider template that only visits books with URLs "
            "matching a specified substring."
        ),
    }

    def parse_navigation(
        self,
        response: DummyResponse,
        navigation: ProductNavigation,
        dynamic: DynamicDeps,
    ):
        for item in super().parse_navigation(response, navigation, dynamic):
            if (
                isinstance(item, Request)
                and item.callback == self.parse_product
                and self.args.require_url_substring not in item.url
            ):
                continue
            yield item
The code above makes the following changes to your earlier code:
A new
metadataclass attribute is defined in your spider class. It inherits the metadata from the parent class, and overrides thetitleanddescriptionparameters, while keeping thetemplateparameter that is set toTruein the parent class.pydantic.Field()is now used to define additional metadata for your customrequire_url_substringspider parameter.
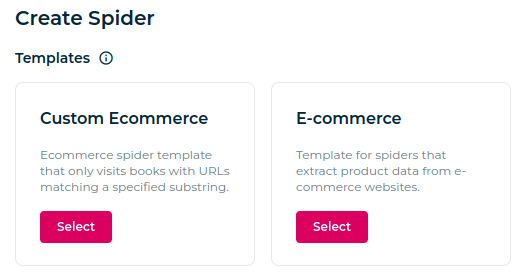
Save your changes, re-deploy your code and open Spiders › Create spider again in Scrapy Cloud. You will now see that your custom spider template has changed accordingly.

If you select your custom template and you scroll down, you will also notice that your custom parameter has changed accordingly as well.

Next steps#
You have learned how spider templates are declared, and how to create your own from a built-in spider template.
On the next next chapter you will learn to write post-processing code.
