Run your first AI spider#
In this chapter of the Zyte AI spiders tutorial you will run your first AI spider in Scrapy Cloud.
Note
AI spiders do not require Scrapy Cloud, as you will see later on. However, Scrapy Cloud allows running AI spiders with minimum setup and no maintenance.
Create a project#
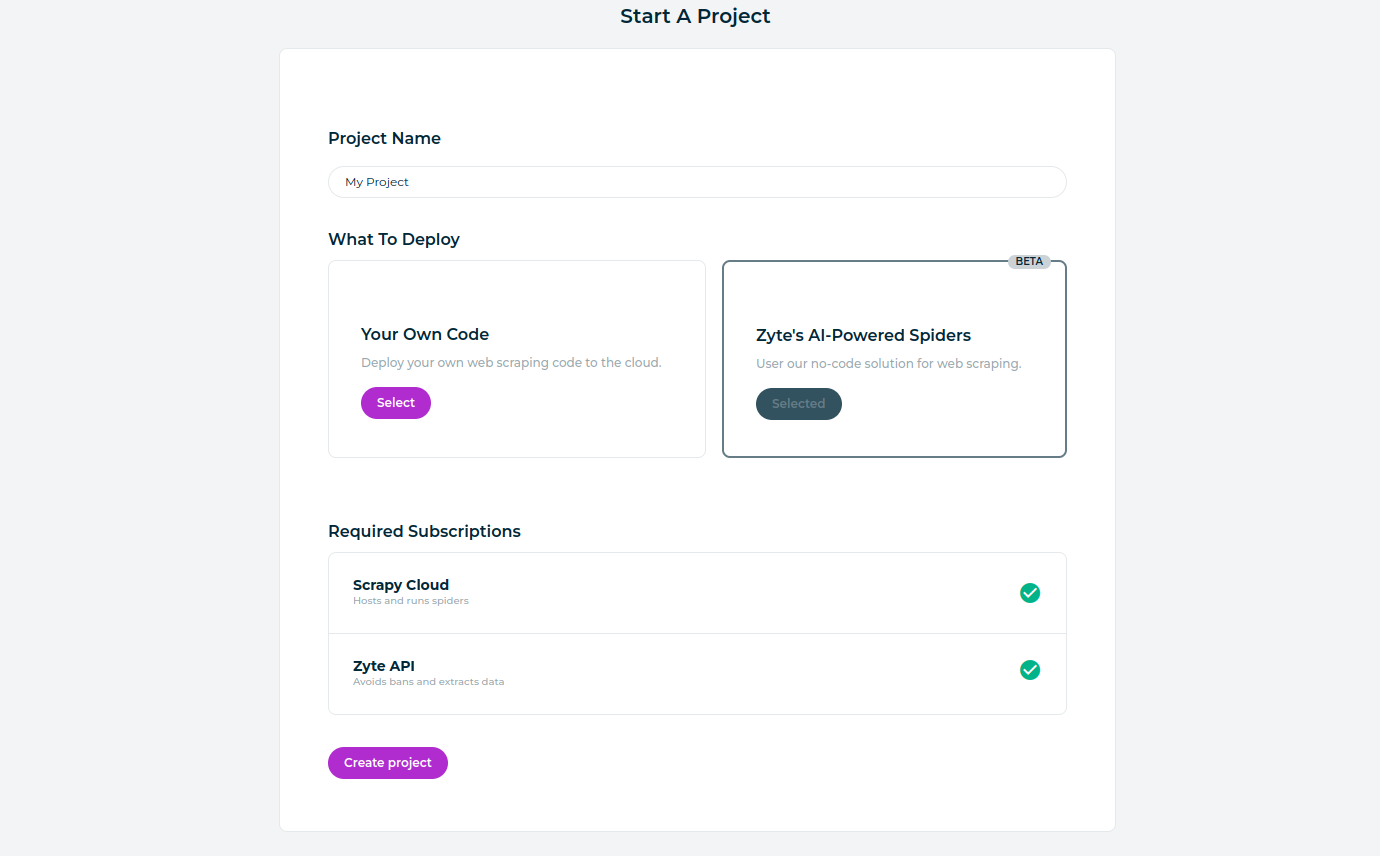
First create a Scrapy Cloud project with AI spiders:
Log into the Zyte dashboard.
Open the Start a Project page.
Enter a Project Name.
Click Select under Zyte’s AI-Powered Spiders.
Click Create project.
Run the e-commerce spider#
Then run the e-commerce spider:
On the left-hand sidebar, select Spiders → Dashboard.
On the Spiders page that opens, select
ecommerce
.On the top-right corner, select Run.
On the Run dialog that opens:
Click the plus sign (+) next to Arguments 2 times to allow defining 2 job arguments.
On the first argument row, set
url
as name andhttps://books.toscrape.com/catalogue/category/books/mystery_3/index.html
as value.On the second argument row, set
crawl_strategy
as name andnavigation
as value.Click Run.
Note
Creating a virtual spider out of an AI spider template offers a nicer user experience for argument definition. You will learn more about virtual spiders and templates later on.
A Scrapy Cloud job will start running now, executing the AI spider for e-commerce websites. You can find the running job under Running, or under Completed after it finishes running.
Since you set
crawl_strategy
to navigation
, the job will visit the specified start URL,
and it will automatically discover and also visit the second page of that
category and all the book pages linked from both of those pages. The e-commerce
spider supports alternative crawling strategies (see
EcommerceCrawlStrategy
).
Once the job finishes, click the number in the Items column to open a page with the extracted data items, which you can also download. It should be 32 items, the number of books available in that category.
Understand how the spider works#
What you have just run is a Scrapy spider that uses Zyte API automatic extraction to work automatically on any e-commerce website.
Specifically, because you used the navigation
crawl strategy, this spider:
Requests productNavigation data from the start URL.
Requests product data for every URL from productNavigation.items. Every item in the job output is one of these product records.
Repeats these steps for every URL from productNavigation.nextPage and productNavigation.subcategories.
Optimize the extraction source#
Zyte API automatic extraction can work on top of either a raw HTTP response or browser HTML. This choice can be quite impactful in terms of quality, crawl speed and cost.
Currently, Zyte API defaults to browser HTML in most cases, as it usually provides the highest extraction quality. However, where HTTP meets your needs, it is usually worth using it instead.
Now, run the e-commerce spider again, but
this time set a 3rd parameter, with name
extract_from
and value httpResponseBody
.
Once the job finishes, you need to determine how quality differs between the 2 jobs.
The first aspect of quality is coverage: how many of the target items were actually extracted? At a first glance:
Coverage is 100% in both cases. Both jobs found all 32 items.
Next, compare the data of the output items from each job, and see if there are any data mismatches, either fields with different values in each job, or fields that are only present in one of the jobs. You can either use the Items page of each job, or download the items and inspect them locally with some text editor.
Tip
It is normal for items to be in a different order. For technical
reasons, crawling does not happen in a fixed order. So, pick one item from
a job, then find an item in the other job with the same url
, and
finally compare all other fields of those 2 items.
Spoiler warning — these are the differences:
The first,
browserHtml
-based job has 2 extra fields, aggregateRating and brand.The second,
httpResponseBody
-based job extracts the right value in the sku field, instead of the UPC.
After this analysis, you would have to make a choice based on your needs. If
you need the aggregateRating or
brand fields, browserHtml
may be the right
extraction source. If sku is more important to
you, then httpResponseBody
would be the way to go.
And you have more options:
You can open a support ticket to report any extraction issue you experience. Specify an example URL, the extracted data type (e.g. product) and the extraction source you used (default,
httpResponseBody
,browserHtml
), as well as the expected and actual field values.Our AI models support quick fixes in some scenarios, so our support team may be able to address some of your issues right away. Any issue that we cannot address right away we will take into account for future iterations of our AI model.
You can use custom code to manually address any extraction issue yourself. You will learn how to do this later on.
In cases where the output of httpResponseBody
is good enough, go with it,
as it is usually significantly faster and cheaper than browserHtml
. But see
for yourself: select the burger menu on the top-left corner, then Stats,
then open the Requests tab, and select today in the Date filter.
Now compare the Response time and Cost of requests with product
under Requested features (i.e. browserHtml
) and requests with product
(from httpResponseBody)
instead. httpResponseBody
requests are 4+ times
cheaper and can be about 10 times faster.
Based on the quality, speed and cost, httpResponseBody
seems like the right
choice for https://books.toscrape.com. However, things can be quite different
for other websites. When targeting a new website with an AI spider, it is often
worth it to perform a quick analysis like this to find out which value of
extract_from
best fits your needs.
Next steps#
You are now familiar with the basics of AI spiders.
You have used the e-commerce spider and learned about its
most important parameters:
url
,
crawl_strategy
and
extract_from
.
You can now try running the e-commerce spider again with different parameter values. For example, try pointing it to a different e-commerce website.
Tip
By default, the e-commerce spider is limited to
100 requests. Set
max_requests
to a different value as needed. Use 0
to disable.
Once you are ready, move on to the next chapter.