Deploy and run on Scrapy Cloud
You now have a working Scrapy project that you have been running locally. Running your code locally is fine during development, but for production you usually want something better.
You will now deploy and run your code on Scrapy Cloud, which you can do for free.
Deploy to Scrapy Cloud
Note
Uses Agentic Web Data.
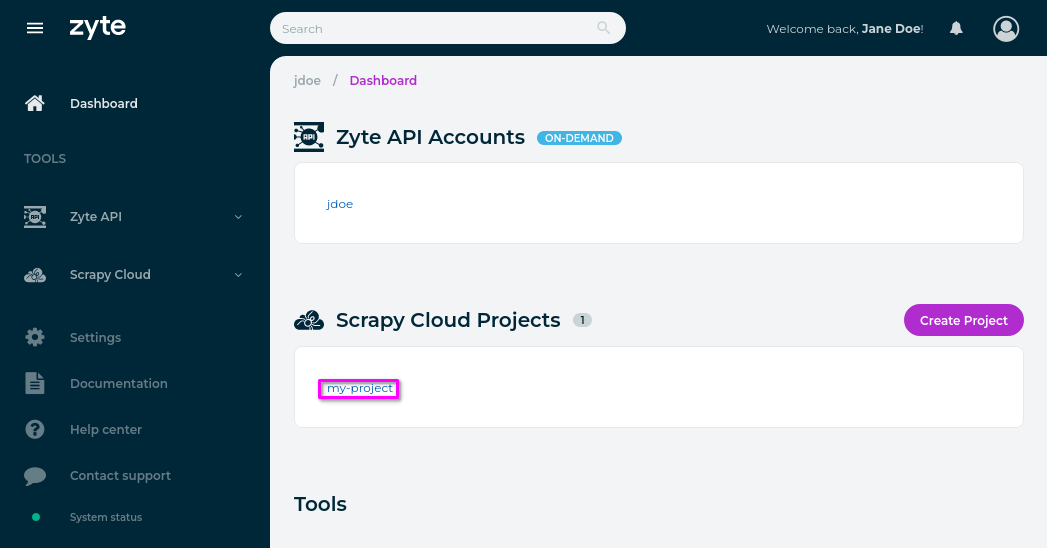
Create a Scrapy Cloud project on the Zyte dashboard.
Once created, copy your Scrapy Cloud project ID from the browser URL bar.
For example, if the URL is
https://app.zyte.com/p/000000/deploy?state=deploy,000000is your Scrapy Cloud project ID.Prompt Claude Code to:
Deploy to Scrapy Cloud project
000000Replacing
000000with your actual project ID.
Note
Uses Web Scraping Copilot.
Create a Scrapy Cloud project on the Zyte dashboard.
Back to Visual Studio Code, select Web Scraping Copilot on the sidebar.
On the Spiders view title, click the Deploy to Scrapy Cloud button.

Complete the interactive Scrapy Cloud setup steps.
Add the following to
web-scraping-tutorial/scrapinghub.yml:stacks: default: scrapy:2.14-20260217
Click the Deploy to Scrapy Cloud button again, and confirm.
Once your Scrapy project has been deployed to your Scrapy Cloud
project, you will see a Run your spiders at: <link> line in the
output.
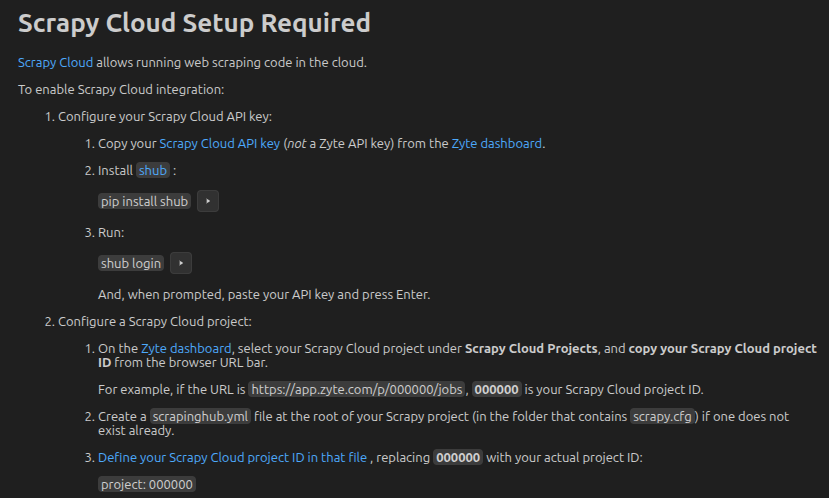
Create a Scrapy Cloud project on the Zyte dashboard.
Install the latest version of
shub, the Scrapy Cloud command-line application:pip install --upgrade shub
Create a YAML file at
web-scraping-tutorial/scrapinghub.ymlwith the following content:stacks: default: scrapy:2.14-20260217
Copy your Scrapy Cloud API key (not a Zyte API key) from the Zyte dashboard.
Run the following command and, when prompted, paste your API key and press Enter:
shub loginOn the Zyte dashboard, select your Scrapy Cloud project under Scrapy Cloud Projects, and copy your Scrapy Cloud project ID from the browser URL bar.
For example, if the URL is
https://app.zyte.com/p/000000/jobs,000000is your Scrapy Cloud project ID.Make sure
web-scraping-tutorialis your current working directory.Run the following command, replacing
000000with your actual project ID:shub deploy 000000
Your Scrapy project has now been deployed to your Scrapy Cloud project.
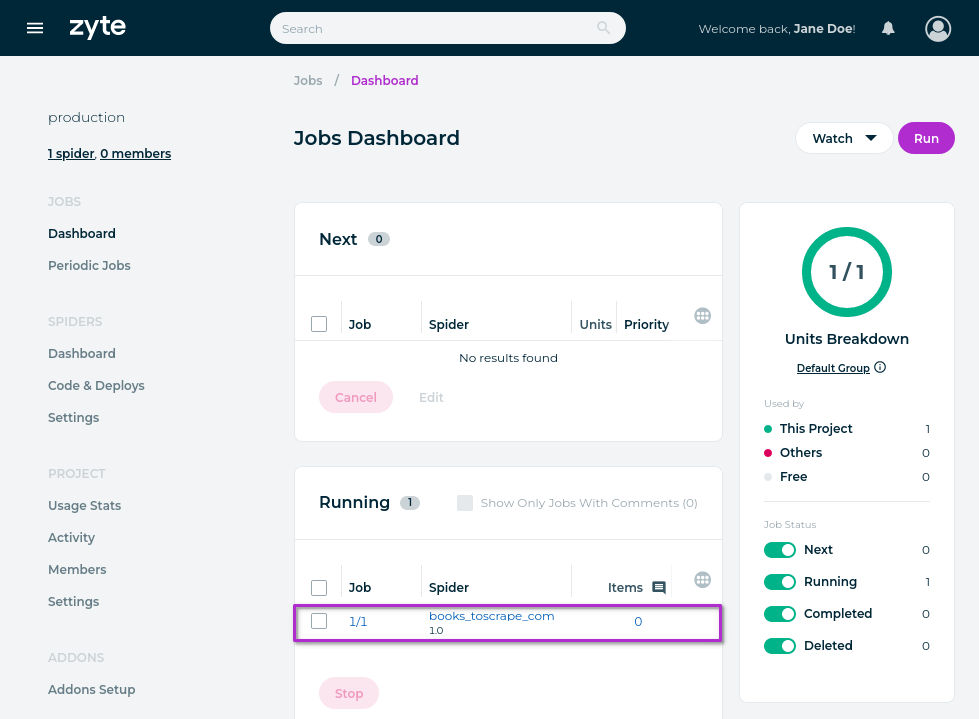
Run a Scrapy Cloud job
Now that you have deployed your Scrapy project to your Scrapy Cloud project, it is time to run one of your spiders on Scrapy Cloud:
On the Zyte dashboard, select your Scrapy Cloud project under Scrapy Cloud Projects.
On the Dashboard page of your project, select Run on the top-right corner.
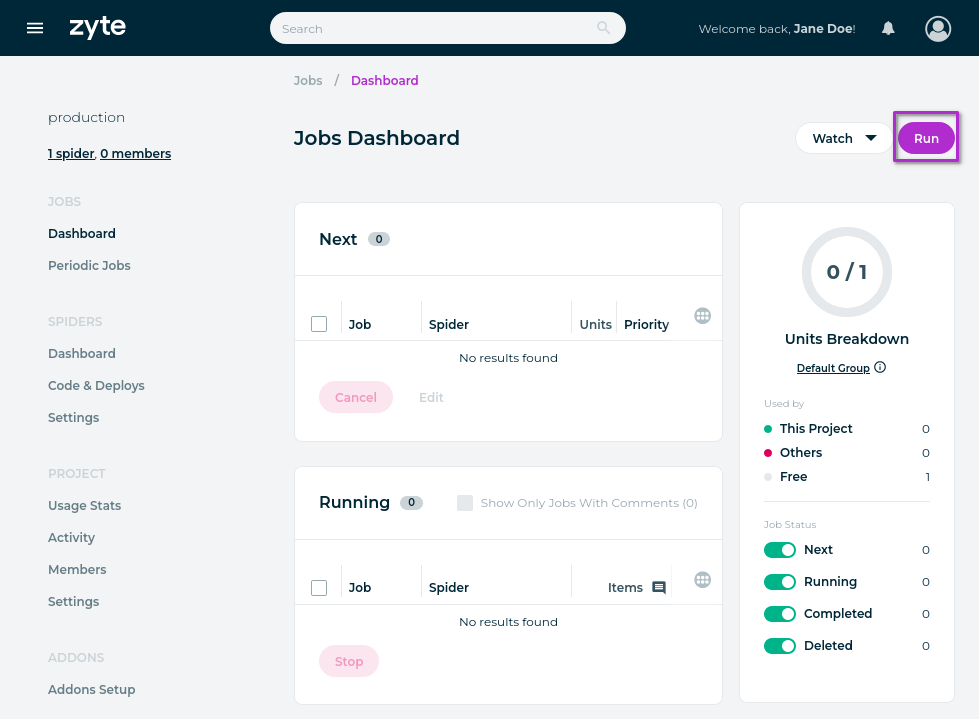
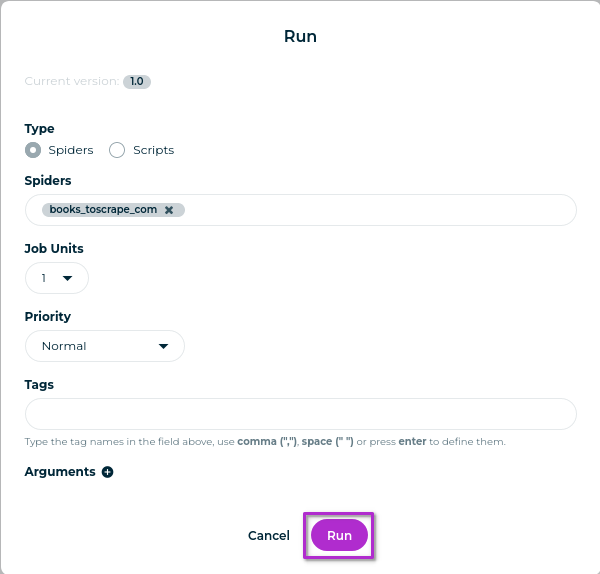
On the Run dialog box:
Select the Spiders field and, from the spider list that appears, select your spider name.
Select Run.
A new Scrapy Cloud job will appear in the Running job list:
Once the job finishes, it will move to the Completed job list:
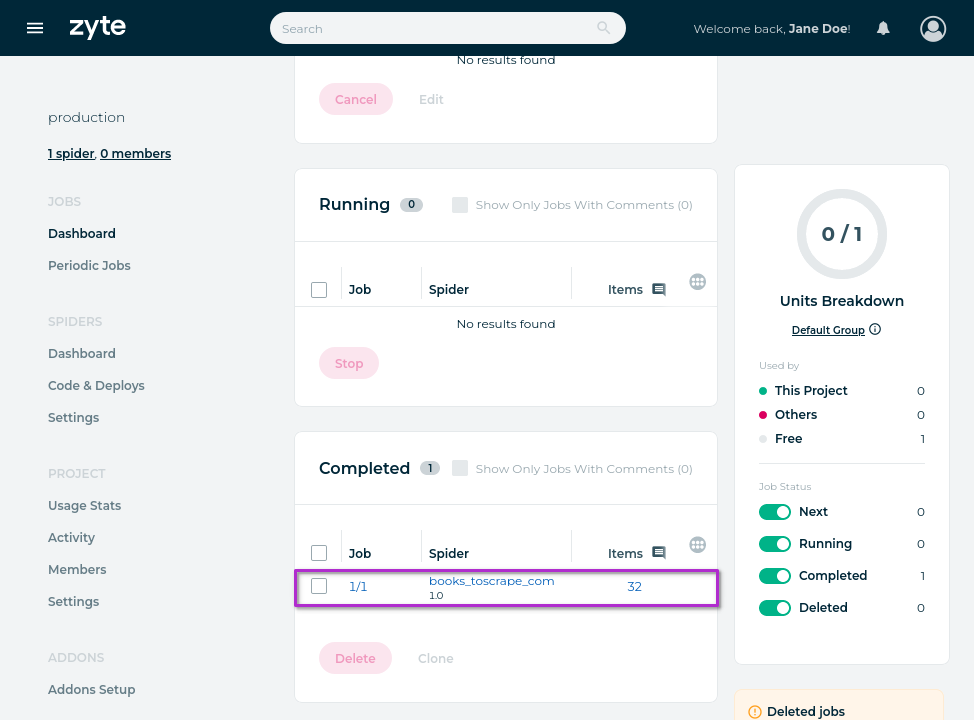
Follow the link from the Job column, 1/1.

On the job page, select the Items tab.
On the Items page, select Export › CSV.
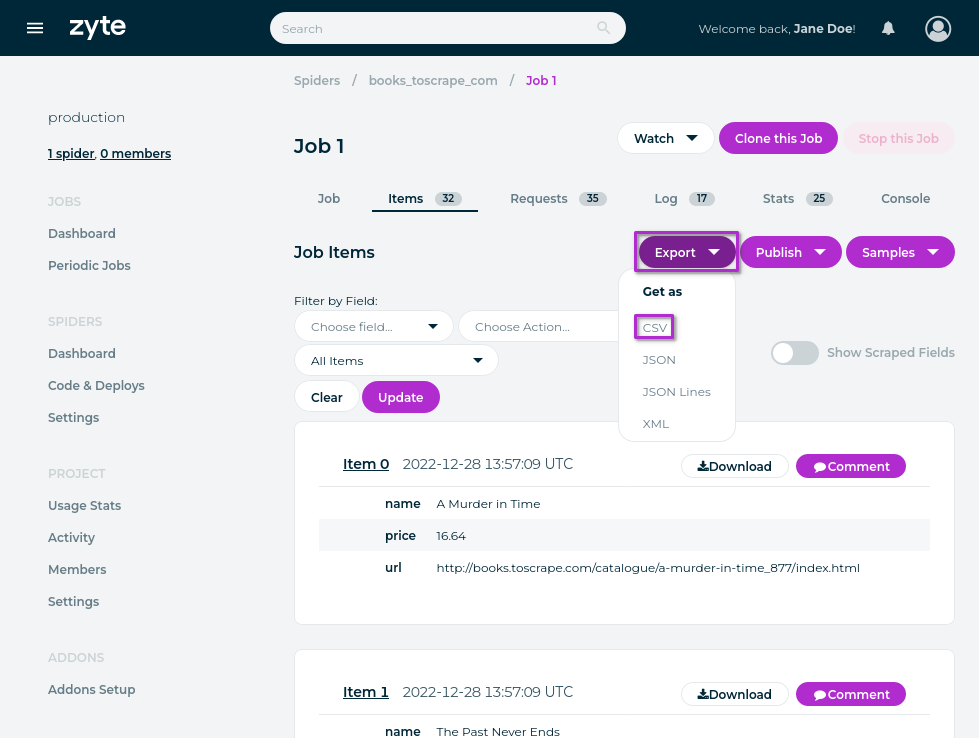
The downloaded file will have the same data as the books.csv file that you
generated locally with your first spider.
Continue to the next chapter to learn how to avoid website bans.